Flash for Nikon DSLRs

Flash for Nikon DSLRs


When it comes to choosing flash units for Nikon cameras, there are plenty of great choices available on the market – from cheap flashes with limited functionality for beginners, to advanced speedlights with complex features for demanding professionals. Choosing the right flash can be an overwhelming task for beginners, especially for those who are just getting into flash photography. In this article, I will go through different options (both low-budget and high-demand) that are available today and provide my recommendations.

1) Why you need an external flash

I remember when I purchased my first DSLR, I expected it to be a world better than my old point and shoot that I used for years. It certainly was much better when taking pictures on a sunny day outside, but not that great for taking pictures indoors with flash. To my disappointment, the images from my DSLR looked almost as flat as images from my point and shoot camera and I could not figure out if it was me doing something wrong or the camera that had limitations for taking pictures indoors.

Indoors professional flash photography
NIKON D3S + 24-70mm f/2.8 @ 24mm, ISO 1600, 1/50, f/8.0

Does this sound familiar to you? Are you relating to this story? If you have only been using your on-camera pop-up flash, I am sure you feel exactly the same way I felt back then. And now you are looking for a solution to the problem and don’t know where to start.

If you want your indoors pictures to look better, you will need something more capable and more powerful than your pop-up flash. You need to invest in a dedicated external flash, also known as a “speedlight” in the Nikon world. A speedlight will help you overcome your problems with indoors portraits and will open up new opportunities to take great professional-looking pictures with your DSLR. Let me show you why external flashes are so much better than pop-up flash:

External flashes are much more powerful. With more power, you get more range, so you can can illuminate a larger area and reach your subjects. More power also means that you can diffuse the light without worrying much about losing power, to get a much softer, more natural-looking light.
External flashes do not drain your camera battery. Pop-up flashes operate off your camera battery and external flashes rely on a different set of batteries that are used just for flash operation.
They are a larger source of light. Compare the size of the flash area on your pop-up flash with the flash area on an external flash and you will quickly realize that the latter is much bigger. Bigger light always means softer light in photography.
They are versatile. Many of the external flashes allow you to tilt the flash head in many different directions in order for you to be able to bounce the light off different surfaces.
They recycle faster. Whether you are firing very little light or plenty of it, external flashes recycle and recover quickly for you to be able to take many pictures sequentially.
They can be used off-camera. Some of the more-advanced flashes allow you to take them off-camera for creative flash photography.
They reduce red-eye. Red eye happens when flash fires from a very close distance to the camera lens. External flashes are typically tall, which helps with reducing the effect of red eye. You can even get special accessories/holders that lift external flashes even higher, which will completely eliminate red eye.
They can be grouped with other flashes. Some of the more expensive external flashes can be grouped with other flashes for more power or be used in different configurations.
Lots of accessories for external flashes. You can get lots of different accessories for an external flash, from various gels, bounce cards and light shaping tools to battery packs and radio control units.
As you can see, external flashes have a lot of great advantages. I am sure I missed some other advantages, but you get the idea....

2) Which flash is right for you?

Now that you know that you need an external flash for your Nikon DSLR, you are probably wondering about which one you should go with. Well you opened a can of worms, because there is no easy answer! There are a couple of questions to consider when choosing a flash. Let’s go over those one by one:

What is your budget? Budget is certainly the biggest factor when choosing a flash. With flash units, you almost always get what you pay for. If you cannot spend more than $100 on a flash, expect to buy a third party unit from companies like Vivitar, Bower, Nissin and Sunpak that all have external flashes for under $100. If you do not have budget limitations, then the best flashes are going to be the most expensive ones from Nikon and Quantum.
i-TTL or Manual? Unless you have taken pictures with a strobe before and know what you are doing, I highly recommend getting a flash unit that can use Nikon’s i-TTL (intelligent Through The Lens) system. Think of i-TTL as an “Auto” mode for flash that lets you shoot pictures without worrying about underexposing or overexposing your images – a great way to get started.
Do you want to use your flash off-camera? I personally would not buy a flash that does not let me shoot off-camera. Unless you are absolutely positive that you would always shoot flash on top of your camera, you should try to get one that at least allows you to use it as a slave. Watch the third video on my “how to get the best out of your pop-up flash” article on using a speedlight as a slave together with pop-up camera flash as a commander.
Don’t worry about all other questions for now – the above three are the most important ones to start with. In terms of the budget, I know that some people are ready to pay for a good flash, as long as it gives them great results. If you are in such a situation, then simply skip over to questions #2 and #3 about whether you want to have TTL (and you do) and whether you want to be able to use flash as a slave for off-camera flash.

3) External flash recommendations

So, which flashes would I recommend? Unless your budget is the limiting factor, I would highly recommend to buy the Nikon speedlights. Not only because they are of high quality, but because they are designed to work with Nikon cameras and therefore have many features specific to Nikon cameras. Nikon’s flash system is called CLS (Creative Lighting System) and all Nikon cameras and speedlights are optimized to work with each other. For example, you could increase or decrease the flash power, feature known as “flash exposure compensation” by simply using the camera button instead of touching the flash. When the flash power is good, you could lock the flash exposure by also pressing a button on your camera. You could trigger a Nikon speedlight through the camera, or if you have multiple speedlights, you could set them up in a master and slave configuration. In addition, Nikon CLS comes with other extra features such as “high speed synchronization” to be used in situations where you need to shoot flash at faster than 1/250th of a second (for example in broad daylight). Unfortunately, you cannot do all of the above with a cheap third party flash.

If cost is the biggest dilemma for you, then here are some third party flashes that fully support i-TTL under $100:

Bower SFD728N – the cheapest external flash under $50, with a flexible head to bounce light. Don’t expect much out of this unit, since you get what you pay for. It does not come with a diffuser dome and cannot be used as a slave.
Bower SFD35N – a better version than the above SFD728N, comes with an Auto Focus assist function, which will help you focus better in low-light environments. Cannot be used as a slave.
Vivitar DF350Z – similar to Bower SFD35N, the Vivitar DF350Z is a good overall flash with a flexible head. Also comes with AF assist for focusing in low-light and cannot be used as a slave.
Vivitar DF400MZ – at $99, it is a very capable flash that comes with a built-in flip-out diffuser. The nice thing about the DF400MZ, is that it can be used as a slave.
Bower SFD926N – just a few dollars more than the Vivitar DF400MZ, the Bower SFD926N is a nice flash with plenty of features such as flash zoom based on camera focal length. It also comes with a built-in diffuser and also supports slave mode for off-camera setup.
There are plenty of other flashes at similar price range from various companies.

If you can spend more than $100 on a flash, but want to stay at around $200 price range, then here is what I recommend:

Nikon SB-600 – if you do not care about using flash as a master, the Nikon SB-600 is your best buy. It comes packed with all kinds of great features such as Auto Focus assist, high-speed sync, full i-TTL support and it works great with all Nikon DSLRs. It can only be used as a slave.
Why am I recommending just one flash? Because at this price range, I believe you would be better off with a Nikon speedlight. While other flashes might sound like a good deal, Nikon’s flashes fully support all CLS features and are designed to work best on Nikon DSLRs. On top of that, if you purchase another flash unit from Nikon in the future, the SB-600 would be fully compatible with it. If you are not scared to buy used equipment, then you can get an older Nikon SB-600 for less than $200. If you are not afraid to shoot in manual mode without TTL, the older Nikon speedlights such as SB-26 and SB-28 are also of great value and you can snatch those used for less than $100.

If budget is not a big issue for you and you just want to get a good flash, the list of flashes to recommend is based on features they offer:

Nikon SB-600 – once again, a great value for the money for those who need a single flash to go on camera or to be used in an off-camera setup. If you do not care about triggering other flashes (master mode), then the SB-600 is your best bet.
Nikon SB-700 – the newly released SB-700 is around $100 more than the SB-600, but has a bunch of new features the SB-600 does not have. It can work as a master and a slave, has a newly designed user interface that is very intuitive when compared to the SB-600, comes with a very useful diffusion dome plus two filters/gels for indoors shots and much more. It will certainly be a very popular flash among photo enthusiasts.
Nikon SB-910 – the Mercedes-Benz of Nikon speedlights, the SB-910 is a high-end speedlight designed for enthusiasts and professionals that need the most features for demanding applications. Priced at $550, the SB-910 can be used both as a master and a slave, has a similar intuitive user interface as the SB-700, comes with plenty of accessories such as diffuser dome, filter set and flash stand, has an automatic flash zoom head that can zoom in and out based on the focal length you are using and more. The biggest two advantages of the Nikon SB-910 over SB-700 is that it has a PC/sync cord for connecting external flash units such as PocketWizard and ability to use powerful battery packs.
Quantum Qflash TRIO QF8N – an expensive top-of-the-line flash that has an ultra-fast recycle time and lots of power. Unlike Nikon speedlights, it has a large reflector on the front which diffuses the light coming out of the flash for better quality images and softer shadows. It can work as a master or a slave with additional modules.
Another flash that did not make it to the list because it is now discontinued, is the Nikon SB-800. If you can find it new in a local camera store or get it used, the Nikon SB-800 is a superb flash that can do almost everything SB-910 can.

So, which one should you buy? As you can see, it all depends on how much you are willing to spend and what you will be using it for. If you shoot corporate events and weddings, you certainly want to get SB-800, SB-910 or the Quantum Qflash. You will need all the power and reliability these flashes can provide. If you are going to be using a flash occasionally on-camera or off-camera, then I would go either with the SB-600 or SB-700, depending on your budget. If you are shooting with an entry-level Nikon DSLR such as Nikon D3100/D5000 or older cameras like D40/D40x/D60/D3000 that do not have a commander mode to trigger slave flashes, then you will need to get two flashes – one that could be used as a master and one that could be used as a slave. You can get an SB-700 to serve as a master and a Nikon SB-600 as a slave for those situations.
Related Posts:

know the camera equipment

know the camera equipment

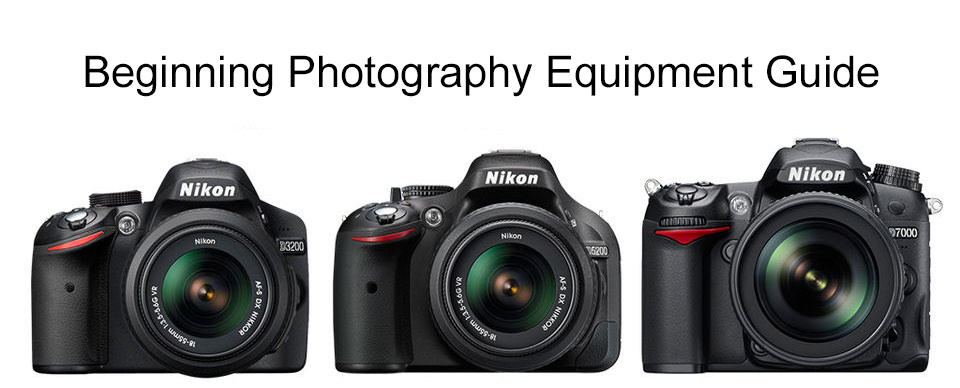
Buying photography equipment for the first time is a daunting task. Useful guides exist to help beginners choose a good camera, but few newcomers realize that the camera itself is only the first of many pieces of equipment necessary to create a full setup for photography. In this guide, I will suggest a complete kit — everything from lens cloths to computer monitors — that will provide a beginner with high quality images (and room to grow) for a price of around 2000 US dollars.

Beginning Photography Equipment\

Note that this guide is not a comprehensive list of equipment that will work for every type of photographer. As your photography becomes more specialized — portraiture, landscapes, wildlife, or anything else — you will gravitate towards more specialized equipment as well. The recommendations below can be considered an all-purpose starter kit rather than a list tuned to one specific type of photographer.

1) The Camera

The core of photography is a camera, or at least the sensor of a camera. At the moment, one of the biggest debates in the photography world is between two different types of cameras: mirrorless and DSLR cameras. Both have their merits, but a beginning photographer on a tight budget should be looking more closely at DSLRs. With entry-level models, new mirrorless cameras cost about the same as new DSLRs, and sometimes less. However, you can still buy older, high-quality DSLR equipment (including lenses) for a lower price than similar mirrorless gear. Mirrorless cameras are filling this gap quickly, but the best camera for a beginner on a budget is almost certainly a DSLR.

Of all the possible DSLR cameras, my strong recommendation is to buy the Nikon D7000, used, from the camera store Adorama. Some people find too much risk in buying a used camera from eBay and Adorama is one of the most respected names in the camera business — when they rate a used camera at E-, its condition will be as good as most “mint” cameras sold through eBay.


The D7000 is better than an entry-level DSLR because it give you room to grow. Although it has the same sensor as some cheaper cameras, it gives you so many more features (including extra dials that make it easier to change settings once you learn about your camera) that make it indispensable. How do I know that the D7000 is so good? Simple — I have taken more than 60,000 photos with it! Check out the three images below, all taken with the D7000:


Keep in mind that the D7000 can be a complex camera for a beginner. However, if you’re dedicated enough to be reading this article in the first place, you are probably the type of person who will grow to appreciate the many benefits offered by the D7000.

Here is a link to the Nikon D7000 at Adorama. Note that this camera has been discontinued, so you have to click on the “Buy it used” heading to see your options. Generally, an “E” quality D7000 will be about $400.

Another great option, especially if you are just starting out, is one of Nikon’s entry-level DSLRs. These cameras have slightly-better image quality than the D7000, and they are easier to use, but they don’t have as many features for learning photography. Nikon’s newest is the D3300. When you buy it with a kit lens, the D3300 from Adorama is $500.

Total: $400 for the D7000

2) Lenses

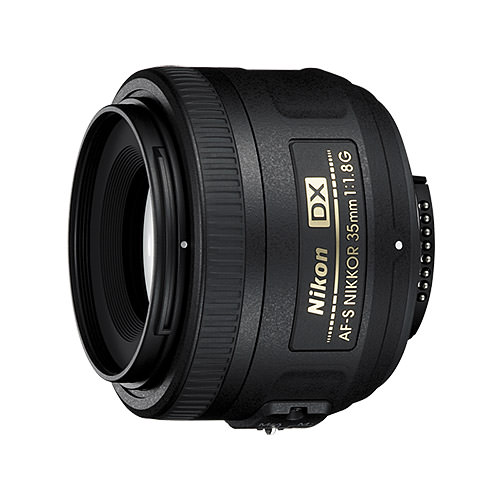
Nikon AF-S DX NIKKOR 35mm f/1.8G

Whereas a camera sensor will record the light that it receives, a lens’s job is arguably even more important: help the light get to the sensor in the first place.
Lenses range from the “free” — those which come in a kit with the camera — to the unbelievably expensive. As a beginner, it can be tough to determine which lenses are worth their asking price, especially if you have no prior knowledge of which lenses even exist in the first place (although our lens databasecan help).
If you want a high-quality beginning lens for the lowest possible price, you should look at prime lenses (those which do not zoom) or third-party lenses. I do not recommend starting with the kit lens that comes with some cameras (usually an 18-55mm zoom), since you will soon realize that you want something better.
My first recommendation, if you use a Nikon camera like the D7000, is to buy the wonderful Nikon 35mm f/1.8 DX lens. This tiny gem is sharp — check out our sample photos — and it costs just under $200. Here is a link to the 35mm f/1.8 DX at Adorama.
To add to the 35mm f/1.8, you will probably want a wide-to-telephoto zoom, and a good choice is the Sigma 17-50mm f/2.8 OS lens. This is a particularly useful lens because it not only has a wide aperture of f/2.8 (which lets it work well in dark scenes), but it also has image stabilization to help make your handheld images sharper. Here is a link to the Sigma 17-50mm f/2.8 OS, which costs $520 at Adorama.
Or, if you would rather stick to a single lens, the revolutionary Sigma 18-35mm f/1.8 is $800, and it would replace both the lenses above. It is a heavy lens, but it is amazingly high-quality — just check out our review. Here is a link to the Sigma 18-35mm f/1.8 lens at Adorama.
Lenses are an individual decision, and these three are nothing more than my own recommendations. If you practice a more specific type of photography (such as wildlife), you could prefer completely different lenses. However, for a typical beginner, these lenses are a great way to find out what type of photography you like the most. Plus, they are good enough to keep even as you grow more specialized.
Total: $720 or $800, depending upon the lenses you choose
3) The Tripod
Often overlooked and undervalued, a tripod doesn’t seem nearly as important as it really is. After all, three aluminum sticks glued together are no more complex than three sticks glued together. Right? Unfortunately, that logic is why many photographers choose to buy the least expensive tripod they can find, then leave it at home all the time because it’s cheaply-made and hard to use. A tripod should be as popular as its buddies Camera and Lens, but somewhere along the way it got the short end of the stick.

You will realize over time whether or not you need a tripod for your photography (and if you do, you will want a more expensive model at some point in the future), but it is important for a beginner to have a solid model as well. With that in mind, my recommendation is to get the Manfrotto MT190X3 tripod. It is not a perfect tripod, but I can say (having used the older version of this tripod extensively) that it should be more than enough for most beginners. Plus, at $150, it is pretty inexpensive (as far as good tripods go). Here is a link to the MT190X3 at Adorama.

However, a tripod is not enough — you still need a ballhead so that you can adjust the position of the camera. I have tried a handful of ballheads in the $100 range, and I can say that the best (by far) that I have used is the Oben BE-126 ballhead. Even with my heaviest camera and longest telephoto lens, this ballhead has never slipped out of position, and it always locks tightly. This head isn’t quite as good as the most expensive ballheads from companies like Really Right Stuff or Arca Swiss, but it is fantastic for the price. Here is a link to the BE-126 at B&H, another highly-reputable camera store.

Total: $260

4) Software

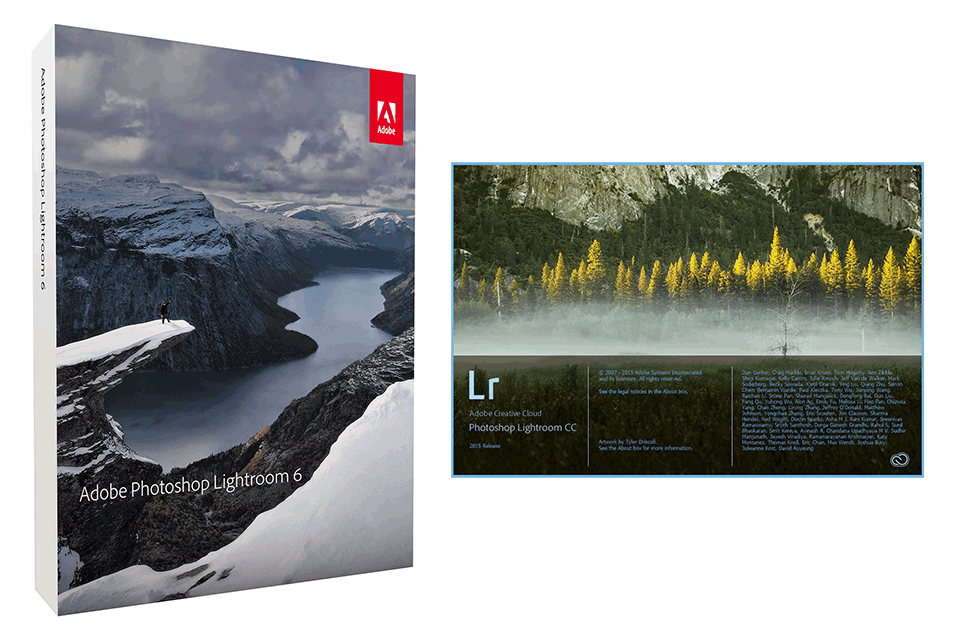
Adobe-Photoshop-Lightroom-6-and-CC

There is a lot of competition for software that processes images, with the two most popular options being Capture One Pro and Adobe Lightroom. These two programs are similar — they both allow you to organize and edit your photos — but Lightroom is far less expensive. Some argue that Capture One Pro is better (whereas some argue the opposite), but Lightroom will is ideal for those on a budget, since it costs half the price. For what it’s worth, I only ever use Lightroom, and I find it to be wonderful.

To purchase Adobe Lightroom 6 for $145, visit this link to Adorama. Note, though, that some products (including the lenses that I listed earlier on this page) can be bundled with Lightroom and save you an additional $40. If you want, you can also download trial versions, both for Capture One Pro and for Adobe Lightroom.

Also, don’t give into the temptation to buy Photoshop just because it is so popular — most photographers will not actually need its features, since it is more of a graphics-oriented specialist program than something like Lightroom. Plus, it is far more expensive (and the newest version is only offered through a frustrating subscription program).

Total: $140, but $100 when you bundle Lightroom with a lens.

5) Monitors

If you are a just starting photography, your current monitor probably is not good enough for serious editing work. Specifically, the colors on your screen will almost certainly be wrong — you will not be editing anything how you think you are.

Check out our monitor purchase guide for more information, although note that several new monitors have come onto the market since it was published. One of the best new models is the AOC 12367FH 23” screen. Don’t be fooled by the bizarre name — at $160, this is one of the least expensive IPS monitors on the market, and you absolutely need and IPS monitor if you want to do serious color work on your computer. Yes, better options exist (often for significantly more money), but this monitor is a great start for a beginner. Here is a link to the AOC monitor from B&H.

Unfortunately, getting a good monitor is only half the battle — step two is color calibration. My strong recommendation is to buy a piece of hardware to calibrate your monitor, such as the $60 Spyder4Express. It does not have all the same features as its $190 older brother, Spyder5Pro, but it gets the job done for a much lower price (assuming you only use one monitor). I edited my photos for almost a year without any calibration, and I never realized how wrong my colors really were. I had to re-edit everything! Save yourself some time and buy a real calibration unit. Here is a link to the Spyder4Express from B&H.


Total: $220

6) Lighting

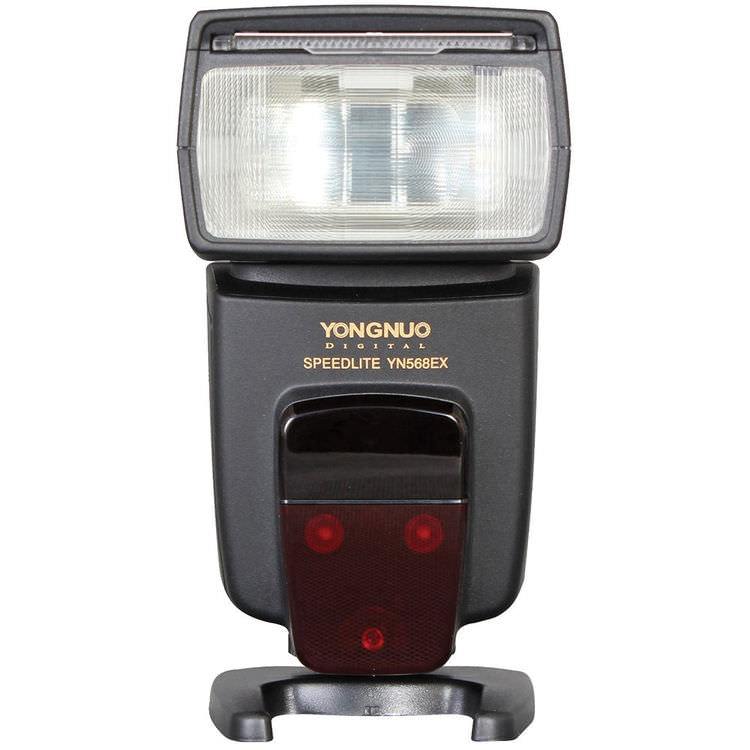
Yongnuo Flash

Disclaimer: I don’t use much external lighting for my photos, mainly because I do not take many images of people. That said, most photographers will need a flash at some time or another, whether for portraits or for creative still-life photography.

Nikon brand flashes cost hundreds of dollars, assuming that you want a flash that can function off-camera in an automatic (TTL) mode. However, third-party flashes with those features can be fairly cheap — check out the Yongnuo YN-568EX, an extremely well-specified flash for the price of $105. Depending upon the genre of photography you practice most, this may be the only flash you need. (Or you may need dozens more — ask any portrait photographer!) Here is a link to the Yongnuo flash at B&H.

You may also want some light modifiers (such as reflectors), but I don’t recommend getting anything more until you are sure that you want to do portrait photography. There is no end to the world of light modifiers, and a beginner should learn the basics before deciding which complex lighting setups to buy.

Total: $105

7) Filters

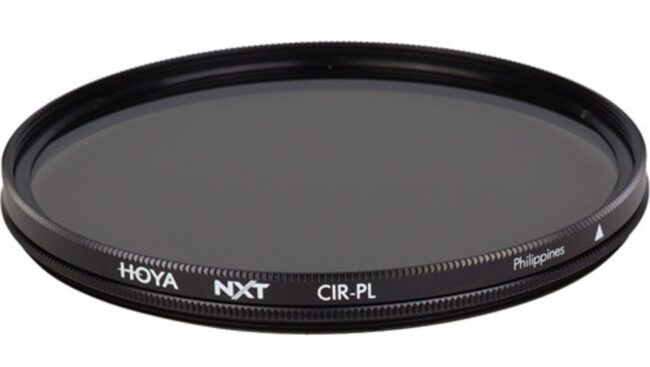
Hoya

Filters are another essential element of a photographer’s toolbox. With digital cameras, only a few filters are even necessary in the first place (the old color-correction filters for film can be replicated using software like Adobe Lightroom) — but some filters cannot be replicated in post-processing. The single most useful filter for digital photography is a polarizer. Just like polarized sunglasses, these filters cut glare from shiny surfaces (other than metal), they darken skies, and they reduce haze. Plus, they make images look more vibrant and saturated.

If you are not a landscape photographer, you will want a polarizer because of these benefits — and if you are a landscape photographer, you will probably never remove the polarizer from your lens! Depending upon the lens or lenses that you use, you will need to get a polarizer of a specific size. Polarizing filters (and filters in general) are sized in millimeters — just like the front rings on a lens. For a lens with a 72mm ring (like the Sigma 18-35mm f/1.8 that I suggested above), you would need a 72mm filter.

If you are on a budget, buy a polarizer that is the same size as the filter ring of your largest lens. For example, you may choose to go with my suggestion to buy both the Nikon 35mm f/1.8 DX and the Sigma 17-55mm f/2.8 OS. If you do, these lenses have different filter ring sizes — the Nikon is 52mm, whereas the Sigma is 77mm. To use the same filter on both lenses, get a 77mm filter a plus a 52mm-to-77mm step-up ring. This is a lot less expensive than buying two filters!

Filters can be expensive, and with good reason — a bad filter will harm the image quality of every image you take. So, don’t skimp on a filter! One brand known for a good balance of price and quality is Hoya, which is my first recommendation for a beginning photographer.

Here is a link to the Hoya 77mm polarizer at B&H. You would use this size if you choose the Sigma 17-50mm f/2.8 OS lens, which has a 77mm filter ring. This filter costs just under $90.

Here is a link to the Hoya 72mm polarizer at B&H. You would use this size if you choose the Sigma 18-35mm f/1.8 lens, which has a 72mm filter ring. This filter costs $60.

Here is a link to B&H for the 52mm to 77mm step-up ring that you would use on the Nikon 35mm f/1.8 lens, if you also bought the 17-50mm f/2.8 lens (which has a 77mm filter thread). This ring costs less than $4.

If you decide that landscape photography is your favorite type, you will probably need two additional filters: a graduated neutral density filter to darken skies (get a rectangular graduated filter, not a circular one) and a regular neutral density filter to blur moving water. However, both of these are specialist filters, and I recommend waiting until you know what you want before buying either. For now, a high-quality polarizing filter should be more than enough.

Total: $60 if you bought the Sigma 18-35mm f/1.8, a bit over $90 if you bought the Nikon 35mm f/1.8 and Sigma 17-50mm f/2.8 OS.

8) Extras

Sensor-Gel-Stick

You will definitely need a bag for your camera, but I recommend against buying one new from a store. Generally, you’ll be able to repurpose an old backpack or messenger bag to carry a camera — if not, try finding one at a garage sale. Instead of paying $50 or more for a bag, you can get one for $5 or less if you buy secondhand and local. I would recommend a remote release for your camera. For the D7000, try the $15 ML-L3 (here is a link for the ML-L3 at B&H). I have owned two of these — they are easy to lose, so be careful — and both have worked quite well.

Make sure to get cleaning equipment for your lens. I recommend that you get two or three lens cloths (this $4 microfiber cloth from B&H is great), as well as a cleaning spray (here is a link to a two ounce spray at B&H for $3). In total, this will be about $10.

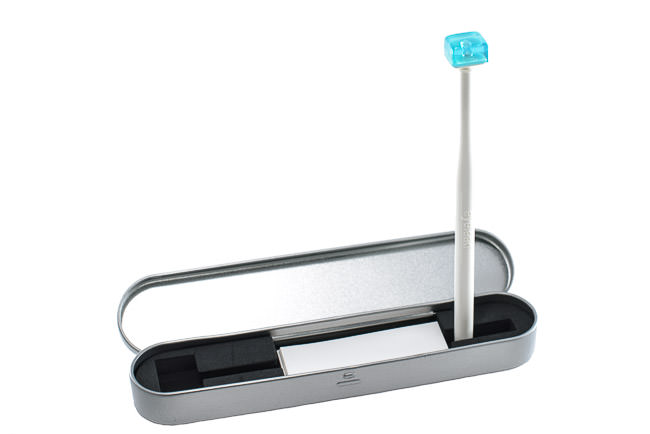
In addition to a lens cleaner, you need a way to get rid of dust that lands on your camera’s sensor. The best way to do so, and the safest, is to use the Sensor Gel Stick, which we sell here at Photography Life. It costs $55, and you may want to buy some extra sticky paper for another $13. Between the two products, your sensor-cleaning equipment will cost no more than $70.

I also recommend an extra battery. That way, you can be shooting while one of your batteries is charging. I strongly recommend getting a Nikon-brand battery — cheaper batteries from third parties can be tempting, but this is one part that you really don’t want to malfunction. Here is a link to the Nikon EN-EL15 battery at B&H, which is the battery that works for the Nikon D7000.

Lastly, you will need memory cards. The D7000 can take two SD cards at a time, and its images take up a relatively large amount of space. I recommend getting two 32GB cards so that you don’t run out of space — the 32GB card from PNY Technologies is a wonderful value at $20. I can vouch for this card completely, since I use the 64GB version in my Nikon D800e camera! Here is a link to the 32GB PNY card from B&H — remember to get two.

Total: $190 or less

9) Summary

If you’re keeping track, that’s a lot of equipment you’ll need — far more than just a single camera and a kit lens. However, no matter how many reviews and comparisons you read, you will be hard-pressed to find better items than these. I have personally used most of the items on this list, and I know other photographers who have used the rest. It can be daunting to start a DSLR system from scratch, but you will have truly everything that you need if you buy the items listed in this article.

When I bought my first DSLR, I soon realized that I had spent all my money on the camera and I had left nothing for a tripod, filters, or a good monitor. I had to wait months before I had a complete and working kit! To make this process easier, I compiled all the information above into an easy list.

Here is a final compilation of the items above — a complete and high-quality photographic kit for under $2000 US dollars:

A camera — Nikon D7000 — $400
A lens or lenses — Sigma 18-35mm f/1.8, or both the Nikon 35mm f/1.8 DX and the Sigma 17-50mm f/2.8 OS  — $800 or $720 respectively
A tripod and ballhead — Manfrotto MT190X3 tripod and Oben BE-126 ballhead — $260
Editing Software — Adobe Lightroom 6 — $100 if you bundle it with one of your lenses, $140 on its own
A calibrated monitor — AOC 12367FH 23” monitor and Spyder4Express callibration unit — $220
A flash — Yongnuo YN-568EX — $105
A polarizing filter — The Hoya 72mm polarizer (for the Sigma 18-35) or the 77mm polarizer with a 52mm to 77mm step-up ring (for the Sigma 17-50mm and the Nikon 35mm) — $60 or $90 respectively
Smaller extra items — A remote release, a microfiber cloth, a cleaning spray for your lens, a Sensor Gel Stick to clean your camera sensor, additional sticky paper for your Sensor Gel Stick, an extra battery, and two 32GB memory cards  — $190
Grand Total: $2135 for the one-lens setup, $2085 for the two-lens combo.

Ok, so that’s a bit over $2000. Buy one of these items used, or ask for a polarizer for your birthday, and you’ve hit the $2000 mark. Congratulations!

If you get the items above, you truly could go for years without needing any more photography equipment. And, when you do decide to buy more specialized gear, all of these items are high-quality enough that you can keep them around for a long time.

Also, although Photography Life receives a small portion of the sales whenever you buy something from the links in the list above, we are not affiliated in any way with the products in this article (aside from the sensor gel stick, of course, since we are selling it on Photography Life)! I am recommending this equipment because it is some of the best for the money, not because a manufacturer is paying me to recommend their product. Also, you will never pay more for an item by clicking on these links — buying them here is just a way to thank us for all this research and testing.


I hope this article has helped you see what you need to put together a camera system for a moderate budget. I am happy to answer any questions in the comments section below, and feel free to recommend your own favorite gear to our readers!

source

Related Posts: