Canon XC10 key features

Canon XC10 key features


    • 12 Megapixel 1" CMOS sensor
    • DIGIC DV5 image processor
    • Fixed 10x (24 - 240mm equivalent) zoom lens with image stabilizer
    • Face Detection/Tracking auto-focus mode
    • Records 4K XF-AVC UHD (3840 x 2160) video to CFast 2.0 cards
    • 305Mbps video codec (4K)
    • Canon Log (12 stops of dynamic range)
    • Slow and Fast motion capture
    • 12 Megapixel stills (JPEG only, no Raw)


Hybrid cameras are those capable of capturing both high-quality stills and video. Although they have been around since the release of the Nikon D90 and Canon 5D Mark II, a professional mirrorless hybrid camera is a new category for Canon. When Canon announced the XC10 at NAB 2015, there was some confusion as to what kind of camera it was. Was it a system targeted towards Canon DSLR shooters or Vixia shooters? A drone camera? Or a micro ENG camera? The only thing that was certain was that Canon positioned the camera as one that could credibly be used for both video and still photography work.

The XC10 is an all-in-one compact hybrid camera that features both 4K and Full HD video capture as well as 12 Megapixel stills. It has great ergonomics for handheld shooting, is built around a 1"-type sensor, and includes the ability to record Canon Log, providing up to 12 stops of dynamic range. Optically, it uses a fixed zoom with a 2x Digital Teleconverter and Optical Image Stabilization, as well as a built-in ND filter.

The XC10's lens gives you a focal range of 27.3-273mm equivalent for video capture and 24.1-241mm equiv. for stills. For monitoring, the camera features a touchscreen with Vari-Angle LCD monitor and an included loupe to mount to the LCD for viewing in bright environments. Unlike the 1080p EOS 5D Mark III, the XC10's video workflow options should meet the standards for professional video shooters, offering H.264 4:2:2/8-bit MXF 4K UHD (3840 x 2160) files (up to 305Mbps) to internal CFast 2.0 cards, or Full HD (1920 x 1080) to SD cards.

Its form factor sets the XC10 apart from typical DSLR and compact mirrorless cameras like the Sony a7R II or Panasonic GH4. With its adjustable side grip and loupe attached for continuous run-and-gun video shooting, the XC10 slightly resembles Canon's Cinema EOS cameras, such as the C300 Mark II and the C100 Mark II. With its side grip and adjustable LCD, you can comfortably shoot and monitor your shots at any angle.

Though probably intended for slightly different audiences, on paper the XC10 has a couple of competitors in this space: Sony RX10 II/III and Panasonic FZ1000. All three cameras contain 1"-type sensors and capture 4K video. The RX10 II/III also give you cinematic picture profiles, including S-Log2 which, like Canon Log, extends the cameras' latitude. Unlike the RX10 II/III and FZ1000, which are aimed at stills photographers, the XC10 does not support Raw image capture. Also, the XC10 is by far the most expensive of the three with a retail price of $2,499 (though street prices hover around $1,999).

And if video is your primary format, the XC10 could well be a solid replacement for your DSLR, especially if you need to capture 4K. So the question becomes, can the XC10 be a credible stills camera for people who primarily shoot video but need high quality stills in certain situations? Let's find out.

Related Posts:

Skin Tones ( picture style )

Skin Tones 

Each Picture Style renders skin tones slightly differently so a particular Picture Style may be chosen depending on whether pink skin or tanned skin is preferred.  An example of each Picture Style is shown below, with the Contrast and Saturation levels similarly matched.

Standard 7,-2,0,0.  Standard gives quite natural skin tones.  If you're really picky you'll just notice a hint of pinkness.

Portrait 7,-2,-1,0.  Portrait gives a strong, rosy overtone to skin tones.  It is more of a specialty application if you want rosy skin.

Landscape 7,-2,-1,0.  Landscape overlays a slight orange overtone which gives a slight goldness to skin tones.

Neutral 7,-1,1,0.  Neutral balances all colours evenly so it gives no overtones and accurate colours.

Faithful 7,-1,1,0.  Faithful also gives rosy skin tones but not as intense as Portrait.

Autumn Hues 7,-2,-1,0.  Autumn Hues gives a nice, natural and tanned look to skin tones. 


Final Comparison
Following all of these tweaks you should get much more vibrant and colourful photos now.  Here is a comparison of factory and custom settings (click to enlarge):


Standard 7,0,0,0.

Autumn Hues 7,-2,-1,0.                                Equivalent to Standard 7,-2,0,0.


For even more vibrant grass and folliage I also have a customised Autumn Hues Picture style which can be downloaded from here and used in Digital Photo Professional or in-camera: Autumn Hues Extra Green 3

Enjoy your photos and I wish you well with beautiful colours.


Autumn Hues 7,-2,0,0. Daylight WB.

source


Related Posts:

Color Tone & WB ( picture style )

Color Tone 

The Color Tone setting shifts colours (Hue) around the colour wheel to give a different tint.  Although the manual says that it only shifts skin tones between pink and yellow, it also affects other colours too.  You can use it to correct skin tones but be aware that it will also shift other colours too.

Standard 7,-2,0,-4.  Color Tone set to -4.

Standard 7,-2,0,4.  Color Tone set to 4.

Standard 7,-2,0,0. Color Tone set to 0.

WB
The White Balance helps to correct colour casts caused by different sources of lighting.  Sunlight is bluish, whilst tungsten light is reddish.  AWB automatically adjusts for different lighting conditions but occasionally it misses the mark, which can lead to either very pale (overblue) photos, or very saturated (overamber) photos.  Shooting Raw makes WB correction very easy since Digital Photo Professional has all the same WB presets found in the camera.

Standard 7,-2,0,0.  AWB.  The AWB has slightly overblued this shot causing it to look a bit pale.

Standard 7,-2,0,0.  By changing the WB to 'Cloudy' the colours look much more warmer and saturated.

You can use the WB control in Digital Photo Professional just like attaching a colour filter onto your lens.  In the White Balance Adjustment, select 'Color Temperature' and drag the slider to the right to make it warmer, or to the left to make it cooler.

Autumn Hues 7,-2,0,0.  AWB

Autumn Hues 7,-2,0,0.  Color Temperature 7700K


Related Posts:

Saturation ( picture style )

Saturation

After setting the contrast we can adjust the saturation.  Saturation is the intensity of colours.  Straight out of the box the Standard picture style is Neutrally Saturated for most scenic shots, so increasing it to 1 pushes colours into vivid territory.


Portrait, Landscape and Autumn Hues should be reduced to -1 for realistic saturation.  Neutral and Faithful need the saturation increased to 1 for a similar degree of saturation.

When shooting flowers and other vivid objects, the colours can oversaturate with regular saturation settings.  Reduce the saturation for more realistic colour.

Autumn Hues 7,-2,0,0.  Saturation set to 0.

Autumn Hues 7,-2,-4,0.  Saturation set to -4.


Related Posts:

Contrast ( picture style )

Contrast

The contrast control adjusts the separation between light tones and dark tones.  The factory preset contrast is actually quite high making highlights very bright and shadows very dark.  This doesn't suit many outdoor shots.  Lowering the contrast reduces this harshness and saturates colours more.

Standard 7,0,0,0. This is the standard contrast that comes out of the box.  The contrast between light and shadows here is already quite harsh.


Standard 7,1,0,0.  A common recommendation given to give photos more pop is to increase the contrast.  This shot was set at Contrast +1.  This makes the problem worse as colours become more pale, and shadows become even darker.

Standard 7,-2,0,0.  A much better recommendation is to reduce the contrast so that colours are more saturated.  Here I have reduced the contrast to -2.

The correct contrast setting is really scene dependant.  There is no single contrast setting that will work for all situations.  Even though I commonly set my contrast to -2, there are times such as the following when I need to reduce or increase the contrast, depending on the scene.


Related Posts:

Canon Picture Styles

Canon Picture Styles

If you've just upgraded to a Canon DSLR from a point and shoot camera, you'll have noticed how plain your shots look with your new Canon DSLR.  Don't fret because you've come to the right place.  This article will show you how you can knock the socks off your point and shoot with colour from your new DSLR.

For some reason, Canon didn't preset the picture style settings for natural contrast straight out of the box.  Perhaps they deliberately wanted to spur people on to play with the settings and understand how each works.  Well it worked for me anyway.  In a nutshell, the basic reason the colours are so plain is because the contrast setting is too high.  There are some subtle colour differences between the different picture styles too.  We'll have a look at tweaking each setting to getting more colour out of your shots.

A good tip for comparing the Picture Style settings is to shoot Raw and upload the Raw shots into Canon's Digital Photo Professional bundled software, where you can play with the settings to your heart's content.


For each image I'll use Canon's In-camera convention of reporting Picture Style settings, separated by commas:  Picture Style, Sharpness, Contrast, Saturation, Color Tone.  Click on any image to see an enlargement.


Standard 7,0,0,0.  This is a typical Canon DSLR shot, straight out of the box.  Contrast is slightly too high with tones either very bright or very dark.


Choosing the Picture Style

There are 6 different preinstalled Picture Styles to choose from: Standard, Portrait, Landscape, Neutral, Faithful and Monochrome.  Each of these Picture Styles emphasises certain colours more or less than others.  For example, Portrait Picture Style makes skin tones more rosy, Landscape overlays a slightly orange-brown overtone whilst Neutral gives the most accurate colours.

You can also download other Picture Styles from Canon's Picture Style website, and upload them to your computer or camera.

For accurate colours with a bit more pop to blue skies, I can recommend the Autumn Hues picture style from Canon's Picture Style website.  The skin tones from this picture style are more natural than any of the built in picture styles, with no overtones.

.

Standard 7,0,0,0.  Although the manual claims that Standard gives vivid colours, for most scenic shots you'll find that the colours are quite natural.  Colours are neutral overall with just a hint of redness in skintones and slightly saturated reds.


Related Posts:

Capturing Ping Che Grass Field – Using Exposure Bracketing

Capturing Ping Che Grass Field – Using Exposure Bracketing

Besides, we can use the in-camera Automatic Exposure Bracketing (AEB) function of EOS cameras to ensure photos with accurate exposure. With this function, the camera will take three images consecutively at different exposure values by adjusting the shutter speed or aperture automatically. Take EOS 6D as an example. Its AEB function can be set from the lowest 2/3 stops (i.e. -1/3→0→+1/3) to the highest 6 stops (i.e. -3→0→3).

We can go to the “Exposure Compensation/AEB” function setting page in the menu to set the AEB function. Some advanced DSLR models offer a “Q” button to do the setting.


Press the “Q” button (when you hold the camera with both hands, the “Q” button is usually reachable with your right hand thumb) and then use the cross keys to select “Exposure Compensation/AEB” (as shown in the photo below). Turn the back dial with your thumb to increase or decrease the exposure compensation. This is same as accessing the “Exposure Compensation/AEB” through the menu, just that the “Q” button offers you a quicker and more convenient way to do so.


Press the “Q” button and after entering the “Exposure Compensation/AEB” setting page, turn the back dial to adjust the exposure compensation

Turn the top dial next to the shutter release button with your index finger will allow you to change the AEB setting, e.g. -2/3, 0, +2/3. The three subsequent images taken will be using these three exposure compensation values.


Turn the top dial with your index finger to change the AEB setting. How far you turn the dial will determine the exposure bracketing range 

At the AEB setting page, turn the back dial with your thumb to change the starting value for the exposure bracketing range. To return to the exposure compensation setting page, turn the top dial with your index finger until you reach the null point.


After entering the AEB setting page, turn the back dial to change the starting value for the exposure bracketing range.

Related Posts:

Personal Style. Picture Style

Personal Style. Picture Style


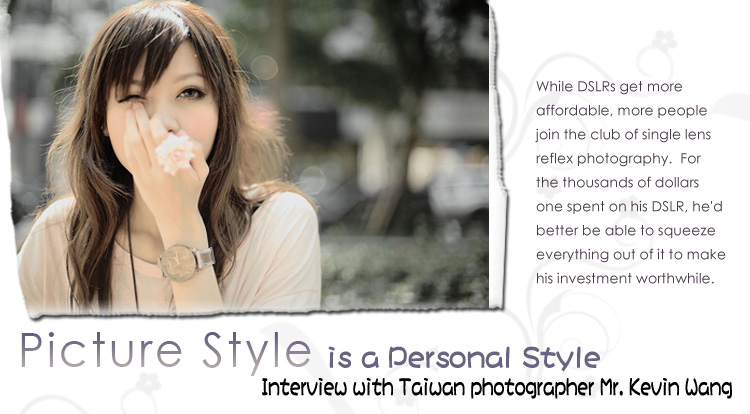
Amongst all the features, Picture Style is a proprietary function which is uniquely Canon. There are 13 kinds of Picture Styles built in. However, users are allowed to create their own picture styles with the help of Picture Style Editor. You can even download other individuals' Picture Styles from the internet, and share yours with others. At this time,?Kevin Wang from Taiwan is notable for his creation of his Picture Styles.

Picture Styles can be seen as a value-added feature of Canon's DSLR cameras. How would Kevin comment on the 13 factory built Picture Styles? "I have tried the original Picture Styles. They are great tools for both beginners and professionals alike. But, in search for more specialization, I?designed various Picture Styles of my own. I did that to up-lift the additional value of my camera," he says.


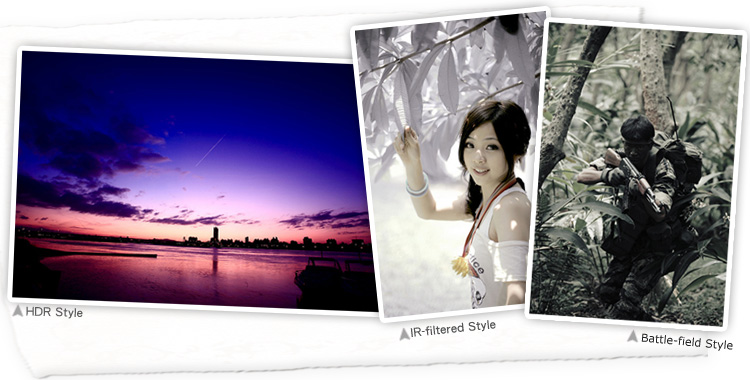
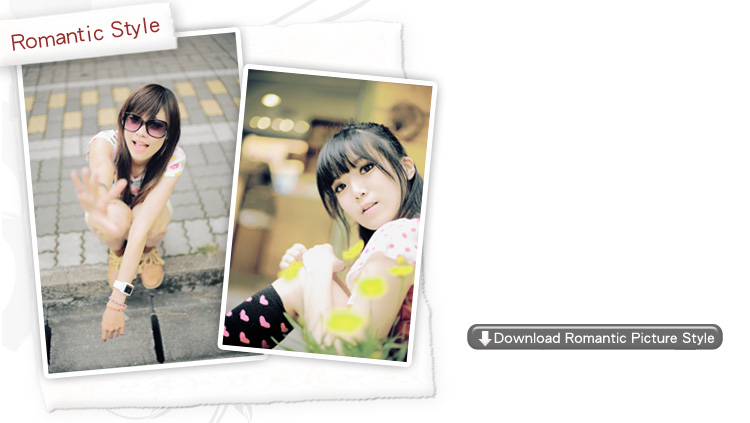
Up till now, Kevin Wang has developed 12 types of Picture Styles. They include 300-the-movie Style, IR-filtered Style, HDR Style, HK-movie Style, Japanese Style, Yamato Style, Battle-field Style, Oil-painting Style, Skin-texture-optimized Style, Comic-portrait Style, Romantic Style, Elegant Style (the effect of negative development and processing). Kevin shared his Japanese Style, Yamato Style and Romantic Style with members of Club Canon. What aspired Wang to develop such personalized Picture Styles? He answers, "I like to take photos with special feelings. Before there were Picture Styles, I spent a lot of time in post production. Software adjustments were applied to each of my photos. Then I studied Picture Style Editor for quite some time. With this software I can build my own Picture Style files and use them during shooting. In this way I can get the special feelings I want right away, skipping previous post production."


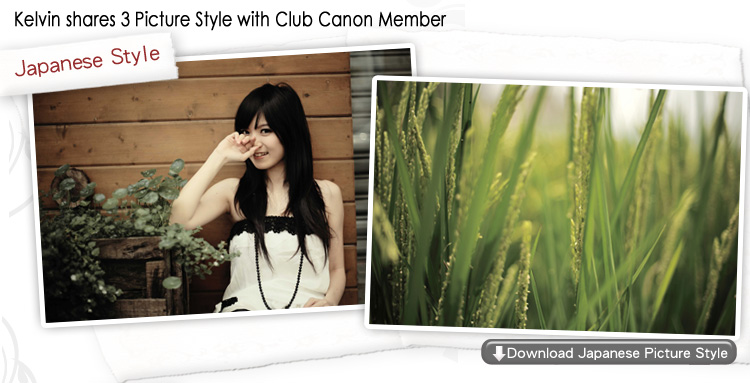
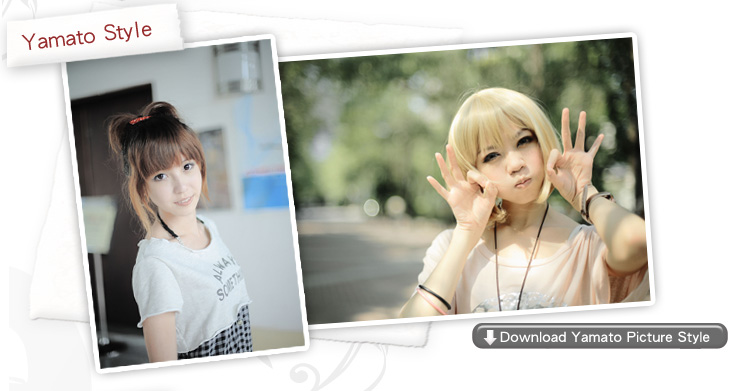
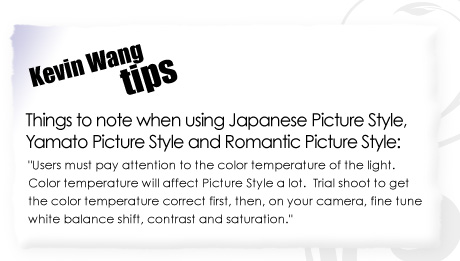
The names of the three Picture Styles might suggest that they are similar. They are not. Each of them has its own purpose and aim, and they interpret a subject in very different ways. "Japanese Picture Style was designed basing on the Japanese photographic style which was once very popular in Taiwan. But I wanted my own kind of Japanese Style, I wanted that mood and feeling clearly anchored into a style. In fact, my Japanese Picture Style is comfortable and clean in it's color rendition. It is different from Yamato Picture Style in that it has richer colors and it emphasize the details in low-key areas. Because it feels comfortable with it's colors, it is very suitable for portrait photography. On the other hand, Yamato Picture Style has some softening effects atop basic Japanese Picture Style. It is soft, comfortable, light and casual in its colors. So it is great for simplistic compositions. Match it with large aperture lens and the result will just be beautiful. Last but not least, Romantic Style aims at a dreamy expression of colors, to the extent that the photo will become poetic. Its physical parameters were set-up according to the covers of love story fictions. I wanted to just press the shutter release and get the result like that of the cover of a love story fiction. The 3 Picture Styles have one thing in common. They take dreamy but detailed images. But, in different situation, they perform differently. That's why they are 3 Picture Styles, not 1. "

Kevin Wang offered free download of the 3 Picture Styles to Club Canon members. He also made his suggestions to those who prepared to create their own Picture Styles: "Beginners have to train up their understanding of color temperature first. They also have to be very sensitive to minor color changes. That said, a skillful person can easily create the feeling he prefers in the Picture Style he creates."


Related Posts: